
Yesterday was a grotty wet day so I took out my Alice roombox , the one going to be for the Hatters workroom, and set to stripping it, a job Ive put off for ages!
I know I took a pic when I bought the roombox as it was then decorated,but went to load it and its now not there so Ill explain, its long and narrow, like the room in the movie. It already had fitted a built in display area in the back with arches cut in, perfect for showing off hats on stands! I needed to strip all the existing paper which was candy pink stripes, and didnt think Id get out the back partition without damaging it, as it seemed truly stuck fast!
John told me to give it to him and set to work, prising off the coving and skirting and then set to easing out the back part! I was cringing and threatening him as he did it, as hes not quite as gentle as me and I could see it breaking and me cursing him, but no, he did a great job and got it all out in one piece! Phew! Once repainted this will fit back in ( hope it goes back in better than it came out!!) against the back wall which will be the lit hat display part.

So I soaked off all the old paper ,I love that job, its very messy but satisfying! Now I have a clean canvas to paper the walls all around, I can paint all the partition, skirting and coving and put in my flooring.
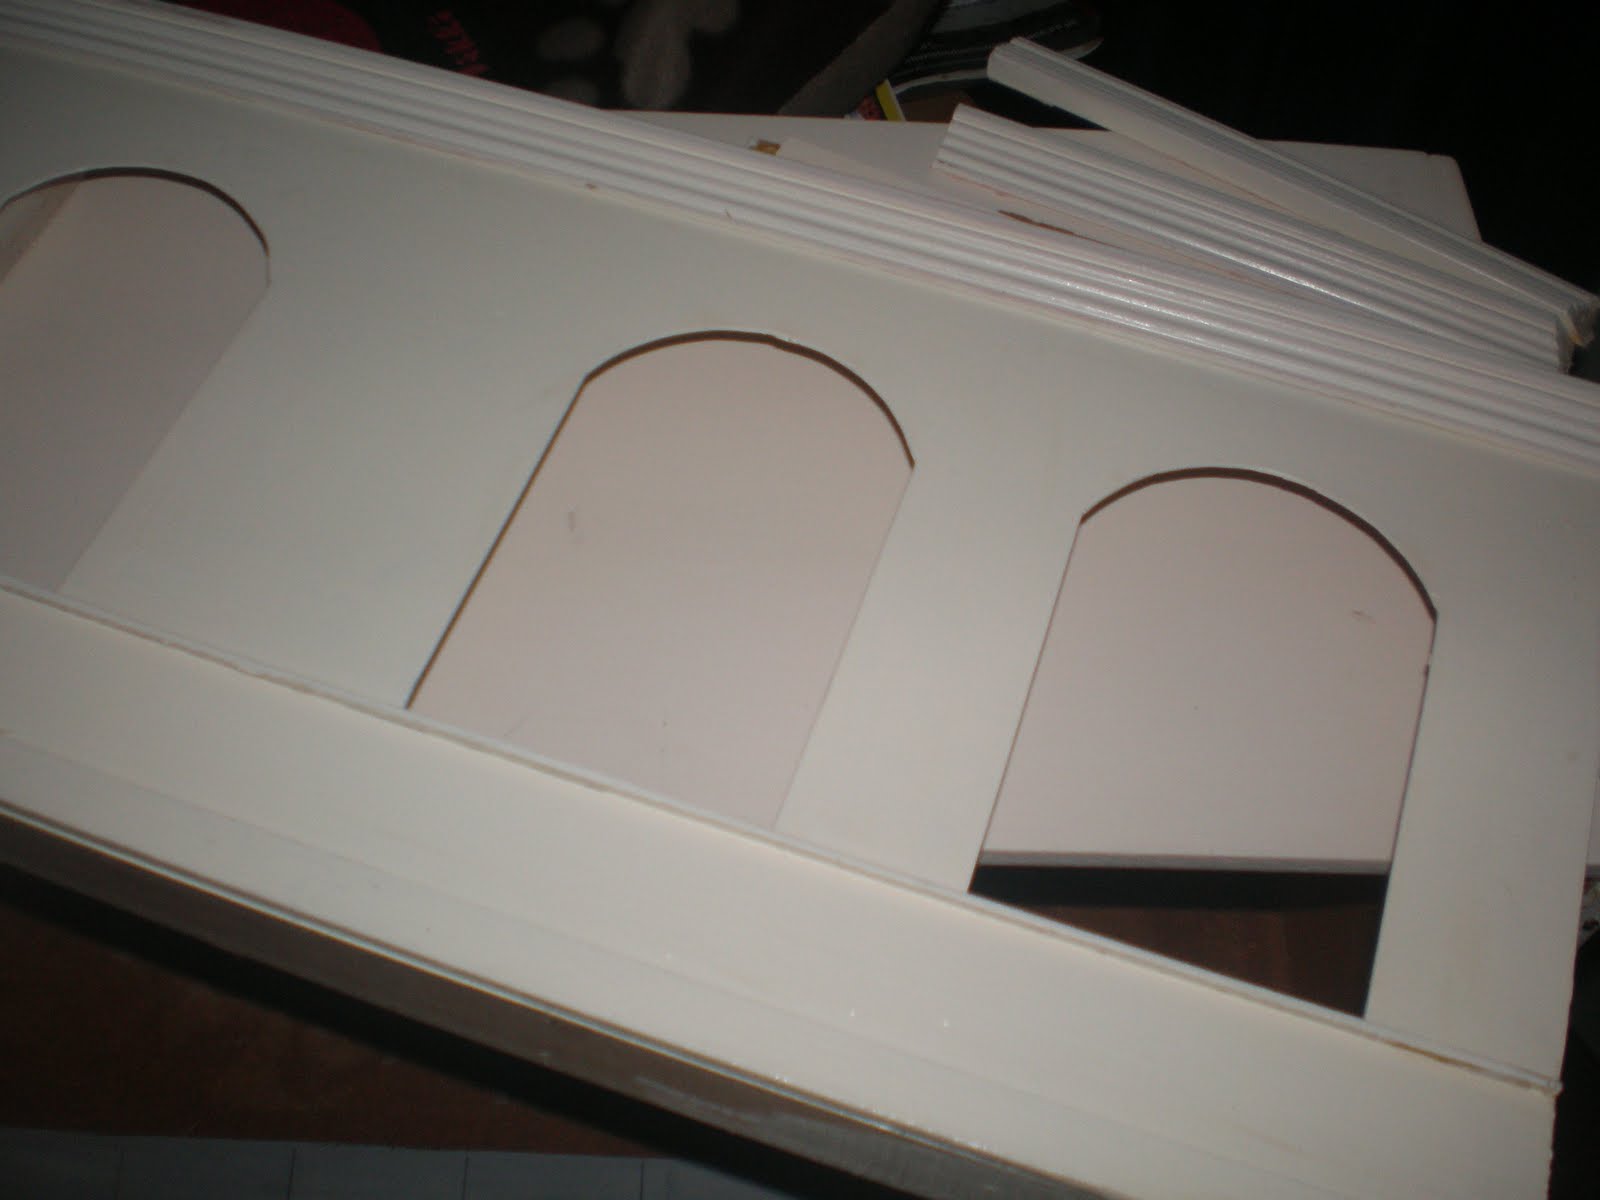
I found 4 little lights already fitted which were above each archway but they are attached to a copper strip, and also seem to have come unsoldered in 2 places so not sure if they work still. Im thinking of replacing them with some on a strip as i have never done copper lighting. I'll have that as a way of highlighting Kats Hats and this will be the only lighting so needs to be bright and id prefer battery lights instead of a big transformer for such a little room. Any ideas anyone? Ive seen spotlights, maybe 4 of them, or LED lights? Janice, you'll know!!
Here is the rear of the roombox with the drilled holes for the little lights which are soldered onto copper but as you can see one is loose.

There is a shop front which I may or may not use, its a lovely cream and black but Im thinking it maybe should be red and black. Also Im using black and white chequed flooring and pinstripe paper on the 2 side walls and behind the partitioning bit behind the hats, but not sure what colour to repaint the roombox itself and the outside of the display part? First thought red but think it would be too loud and take away from all the things going in it, maybe just clean white as theres lots going on in the room, lots of prints, fabrics, pictures, etc? Its cream right now but that dosnt match with the flooring or wallpaper now.Im so indecisive!! BUT at least Ive made a start which is good for me, and I want to do more, even better!
Once the room is decorated most of the things for inside have been made and bought already so Ill have great fun filling it. Just need to make some more fabric and ribbon minis to fill some shelves but I have some great pieces you havnt seen yet so I better get on with it! Progress at long last.
Im saving hard for some large pieces for the room, Id really love a Hatter and Red Queen that can be swapped between this and my Tea party project. SO I will be listing things on ebay soon and will let you know when I do. Janice made a great suggestion to offer swaps for some of my minis for sale but to be honest I really need to save the money as the things I need at the moment are mainly dolls so more major purchases.
I am selling right now on ebay a Brand new and Sealed Harry Potter DVD box set with a trunk style box, and 12 DVDs full of 1 to 5 movies and loads of added extras, about 719 minuites in all I think! Its region 2 but if anyone is interested its got about 3 days to go, its all new and sealed so a great pressie for a Potter enthusiast or collector!

The link is http://cgi.ebay.co.uk/New-Ltd-Edition-Harry-Potter-DVD-Box-Set-1-5-12-Discs-/180625513881?pt=UK_CDsDVDs_DVDs_DVDs_GL&hash=item2a0e1e9d99
Sold out in many stores, but I have found a new one on Amazon for about £75 so Ive listed it at much less than half of this at £29.99 plus postage which is recorded delivery.
Now, its half term this week so cant promise Ill be managing a post on progress until the end of the week as Im planning shopping and cinema trips to keep all these 5 occupied! Wish me luck!
18 comments:
Well, Kate, all I can say is...it's about time! I have been waitng to see this project for ages! I love the arches; it sounds like it will be a great display.
As for the lighting, I used to use copper tape wiring almost exclusively so I can tell you that the "dis"connection you showed can easily be repaired, but lately I have been experimenting with LED lighting and I am liking it alot. I never cared for that eerie bluish glow which was all one could get but now there is a range of light "colors". Hobby railroaders have been using them for years, though they do use transformers, as we do. Odd how their voltages are usually 9V and ours was 12V... Anyway, I have seen (and purchased) 3V recently which operate off a small button battery. I was very pleased with the results when I used them for general illumination.
Looking forward to your progress on this!
I know I know, everythings all ready to go in it so I thought, 'get on with it woman!!' Oooh the lighting sounds good. I dont generally light projects but as the arches are there its perfect to show off the hats . I dont have to reuse the holes already there as they cant be seen once the panel is in place so can do almost anything in tha back top part, but need to position 4 lights , 1 above each arch for the best effect I think. I suppose reconnecting the existing would make sense and could solder the loose wires but how to then get them working, does the wire strip attach to a transformer somehow? xxx
Looking forward to seeing your Alice project finally come together Kate..LOL I've not even started on my Dragon Tower yet. Keep changing my mind what it should look like. Been doing quite a few sketches, but some things can't be rushed. Well that's my excuse and I'm sticking to it..xxxx
I agree Debbie! Im lucky in that the floors are perfect, and the iron spiral staircase, so its just the interior and exterior walls for change and Im thinking of using Michelles method of filler covered balsa or card as I have to work round those stone quoins on the side that wont budge! the buying and filling full of wizard and dragon goodies will be fun though eh?!! xx
Kate...you will need to purchase a small electrical doodad called a "junction splice". I used the one from Cir-Kit Concepts. Here's their description:
"The CK1007 Junction Splice serves as the juncture point for connecting the lead-in wire to a tape run. The imbedded nails, in addition to holding the connector in place, also establish electrical contact between the tapewire and the male pins on the lead-in wire plug. It is simply placed over the tape run
and pounded in. The threaded screw aids in locking the junction splice in place and prevents
accidental dislodgement during use. Mates with all CK1008 series of lead in wires."
Then you use a "junction splice connector" from that to your transformer. Easy peasy.
He he, you should see my face doh! Thank Ill try Leds's!!!! Thanks though Susan! xx
Yey I cannot wait to see this project come along. I am doing movie hats after my holiday my Mum wants a 'Hatter' hat ha ha ha! If you need any heart stuff let me know I might have some bits you can have xxxxxxxxxx
How exciting Kate! The room box looks perfect for the Hatters workroom. I can't wait to see your progress.
Victoria ♥
I have all your wonderful hats ready Kat, cant wait to show them all off properly! xxx
Victoria, at last Ive nearly finished the dressing table with all your beautiful bottles! Im itching to get on with it but the children come first this week! xxx
Looks like its going to be a fantastic project!! Go husband for coming to the rescue!!! I have no suggestions on lights as they scare me to death lol... I have a fire phobia I think! Can't wait to see more! hugs, ara
I almost missed this post!
Arh, mini work at last my girl! lol It will be fab and it's a great room box too with great shaped windows and I don't think I've seen a box like that before!! :o))
The copper wire method is rather hit and miss and very fiddly in my most humble opinion. I know lovely peeps still use it and have success with it, but I'd either go with plug in lights etc or try the LED lights...they all have wires to cope with though! :o)
Looking forward to seeing the next post...um an update!
Michelle xxx
At last ! I'm really looking forward to seeing this progress Kate and will be able to start making some of those characters come to life for you when I get from KDF this may :0)
should work out as good timing !
love the arches !
julie xx
Ara, I really thought he was going to bust it and he would have got what for if he had, so I had to be very thankful when it came out perfect! I dont do lights either but have found some little spotlights maybe just about simple enough for me!! xx
Michelle , it is lovely and long and ive already experimented with all the goodies for it and they all fit in a treat, so just have a few things to make for it, some to reupholster etc and then once decorated im nearly there! have found some easy peasy spotlights just need to drill bigger holes for them and hope they work out! xx
Julie, at last indeed! After May is good, gives me time to not only finish it but to save up lol! And then its on to Alice project number 2, the tea party so they can keep changing between both scenes! Very exciting! xx
Hi Kate, this room box has a lovely shape and the arches will work beautifully.
I would definitely recommend the LED's....have sent you a couple of links by email. They are so easy peasy.
You could put a small strip above each arch maybe.
As Tabitha said there are a couple of light variations, I have seen bright white and candle white but both provide a lot of illumination.
Have a busy fun half term.
Ooo thats a nice shaped roombox, and the arches are perfect for displaying hats! :o) I struggle with the hard wiring too so leave it all to my nephew to do as he actually enjoys it!!! best of luck with the decorating, its never easy juggling 'me time' with half term holidays! x
It looks like it wil be a wonderful project...can't wait to see more!
Please come over to my blog and see how the clothes pins are made!
Sabihax
Post a Comment